DIY Beauty: Easy Natural Beauty Treatments You Can Make at Home
Published: September 16, 2026 Last Updated: September 17, 2026 Sure, most recipes from DIY beauty websites call for ingredients
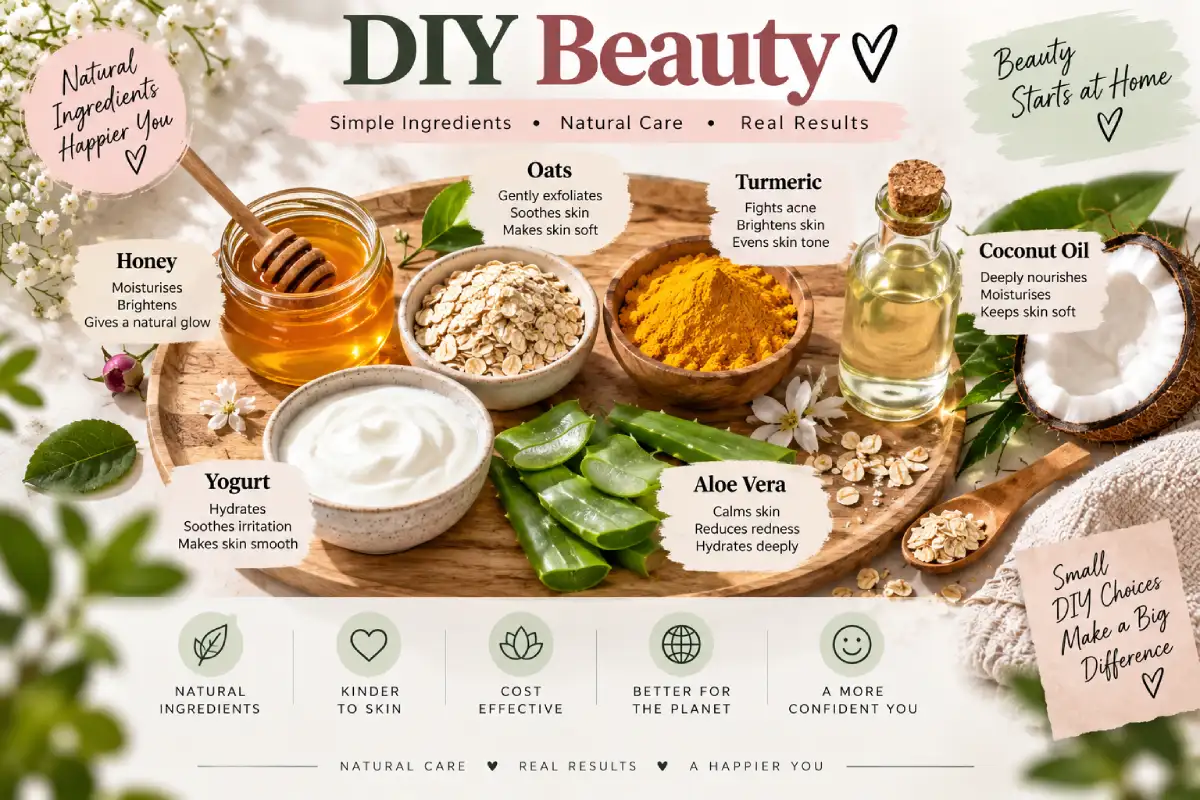
Sure, most recipes from DIY beauty websites call for ingredients you already have under the sink (honey, oats, yogurt, coconut oil). That‘s another big selling point the notion of no lengthy shopping trip or reading long, unpronounceable ingredient lists, with precisely nothing unnatural poured onto your skin or scalp. However, ‘it‘s natural’ does not necessarily mean ‘it‘s right for you’ and quite where that leaves all these well-meaning beauty tips is often overlooked:
Here the ultimate guide to what DIY beauty really is, a few treatments that are worth doing, what they are made of, how to select the best products for your skin, plus the safety habits that keep it all risk free.
What Is DIY Beauty?
DIY beauty is about creating your own skincare, hair care or body care treatments at home using basic, natural ingredients that require little or no processing in contrast to a pre-made, highly developed product.
It typically falls into three categories:
- Face treatments a selection of these include masks, scrubs and toners
- Hair – oil massages, conditioning masks, treatments for the scalp
- Body treatment which include scrubs, moisturizers, rubs, lips treatment.
The attraction is simple: it‘s usually cheaper than buying the same item in the shops, the ingredients are many fewer and much better-known, and for many people making something for oneself is just more satisfying than buying it. The compromise is that products made at home are not subjected to the testing or standards control carried out by the manufacturers, so who else is there to blame if there‘s a problem if not yourself?
Easy DIY Beauty Treatments to Try at Home
These are a set of good starting points easy enough for someone just starting out, most skin types and hair types with a little tinkering with the ratio of one ingredient to another.
| Treatment | What you require. | How to use it |
|---|---|---|
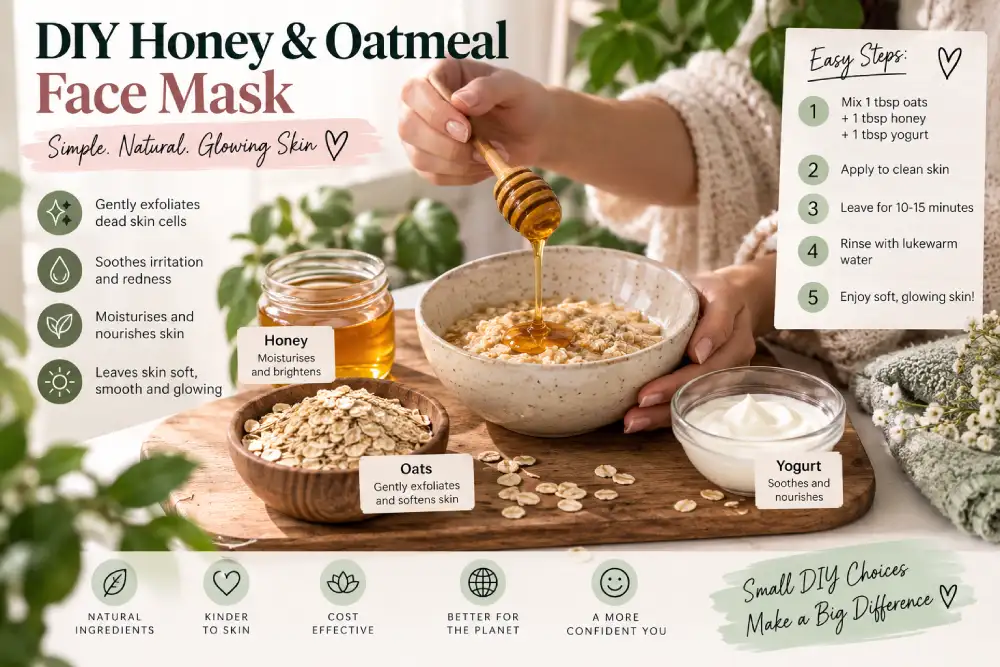
| Mask with honey and oatmeal | 1 tbsp honey 2 tbsp dry oatmeal a small amount of water | Mix into a paste, spread over clean skin, wait 10-15 minutes and wash off with lukewarm water. |
| Yogurt and turmeric brightening mask | 2 tablespoons of plain yogurt a pinch of turmeric | Mix, apply evenly, 10–15 mins, rinse — turmeric stains skin temporarily and should be rinsed off thoroughly |
|
Coconut oil hair mask |
2–3 tbs coconut oil (melted and a little warmed) | Apply to the scalp and ends of the hair, leave for 30-45 minutes or instead leave overnight, wash out with a mild shampoo. |
| Q12) Sugar and oil body scrub. | A cup sugar. A ¼ a olive or coconut oil. | Mix, massage into damp skin in circular motions, rinse body only for use, do not use on face as it‘s quite abrasive. |
| Aloe vera and cucumber eye gel | Fresh Aloe vera gel, a few slices of cucumber, blended and strained | By gently applying around the (not on) the eye area for 3 minutes helps to reduce puffiness. |
All are “make it fresh, use it now” recipes. None of the following are intended to be batch-made and stored for weeks.
Read more: Natural Beauty Remedies— for remedies organized by specific skin and hair concern.
Natural Ingredients Commonly Used in DIY Beauty
A handful of ingredients keep reappearing in DIY for the simple reason that they‘re cheap, readily available and meet a particular purpose:
- Honey the third most natural humectant (drawing moisture into the skin); also used for its mild antibacterial qualities in homemade cleansers and masks.
- Oatmeal an extremely gentle physical exfoliator that can be tolerated even by those with sensitive skin.
- Yogurt–has lactic acid which can help in mild exfoliation; and also relaxing and cooling for inflamed skin
- Coconut oil – one of the best emollients, as it has been found to penetrate the hair shaft, in some cases reducing protein loss from shampooing.
- Aloe vera soothing and mildly moisturizing, calming to skin exposed to sun, aids healing of irritated skin.
- Turmeric often used in Indian houses usually for its anti-inflammatory good nature and brighten too of tone however most probably happening for most of the steeps work is stained skinned stuffs temporarily.
- Lemon juice ditto as above. The one ingredient on this list is most likely to cause irritation or make you more sensitive to the sun so needs to be handled with extra care.
How to Choose Ingredients for DIY Beauty
The right ingredient is more about you skin type than what recipe is fashionable: A simple way to prepare:
- Oily /acne prone skin ligh weight ingredients such as yogurt, rice flour, oatmeal, honey & aloe vera are preferable over heavier oils which can leave a greasy feeling or clog pores in some.
- Dry skin dry skin finds the heavier ingredients, such as honey, coconut oil, avocado easier and more comforting to use.
- Sensitive skin Stay away from harsh ingredients. Get settled with gentler ones (i.e. oatmeal, aloe vera, plain yogurt) and avoid highly concentrated acidic ones (lemon juice, essential oils), or use them at a much more diluted level.
- Combination skin it‘s fair enough to use separate ingredients where needed for example a lighter blend on the T-zone and a more nourishing blend for dry cheeks.
Not sure what skin category you belong to? Keep a close eye on your skin for a couple of days by noon-time to check if it feels tight or itchy (dry), greasy shine (mainly on nose and forehead is oily), patchy and shiny mix (combination).
DIY Beauty Safety Tips and Common Mistakes
DIY beauty is generally low-risk when done thoughtfully, but a few habits make a real difference:
- Patch test anything new. Apply a small amount to your inner arm and wait 24 hours before using it on your face. This matters most for lemon juice, essential oils, and any ingredient you haven’t used before.
- Don’t store fresh mixtures. Recipes made with perishable ingredients — avocado, egg, milk, yogurt — should be made fresh and used the same day. Storing them, even in the fridge, risks bacterial growth.
- Be cautious with citrus and photosensitivity. Lemon juice can make skin more reactive to sunlight. If you use it, rinse thoroughly and follow up with sunscreen before going outside.
- Dilute essential oils. Undiluted essential oils applied directly to skin can cause burns or allergic reactions for some people. A few drops mixed into a carrier oil or an existing recipe is enough — more isn’t better.
- Don’t over-exfoliate. Scrubs and acidic ingredients (lemon, yogurt) used daily can damage your skin’s protective barrier. Once or twice a week is plenty for most skin types.
- Know when it’s not a DIY situation. Persistent acne, unexplained rashes, or skin that reacts badly to multiple products is worth a dermatologist’s opinion rather than continued home experimentation.
Frequently Asked Questions
What is DIY beauty?
Diy beauty is the term for preparing your own skin, hair or body treatments at home. It simply involves making your own treatments with the most basic, least refined ingredients such as honey, oats, yoghurt or coconut oil.
Is DIY beauty actually cheaper than store-bought products?
Overall yes, as the vast majority of recipes involve basic ingredients that you will probably already have. The disadvantage of DIY as opposed to store-bought products is the extra time involved in preparation and the lack of uniformity.
How do I know which DIY beauty ingredients are right for my skin?
Use the ingredient for the corresponding skin type lightweight it contains yogurt or aloe vera for oily or sensitive skin; or heavy in contains honey or coconut oil for dry skin. If unsure do a patch test first and start with a larger, more diluted version.
Can I store homemade beauty treatments for later use?
Please don‘t. Use them the same day if at all possible, especially if they contain fresh dairy products like eggs or milk or fruit that will start to go off if you keep them.
FINAL CONCLUSION
DIY beauty earns its popularity honestly — it’s affordable, ingredient-transparent, and genuinely effective for a lot of everyday skin and hair needs. What separates a good DIY beauty routine from a risky one is choosing ingredients that actually suit your skin type, patch testing anything new, and treating fresh, homemade mixtures the way you’d treat any perishable food. Start with one or two recipes above, match them to your skin, and build from there — or head back to the Natural Beauty hub to see how DIY fits alongside daily habits, homemade facials, and clean beauty products.